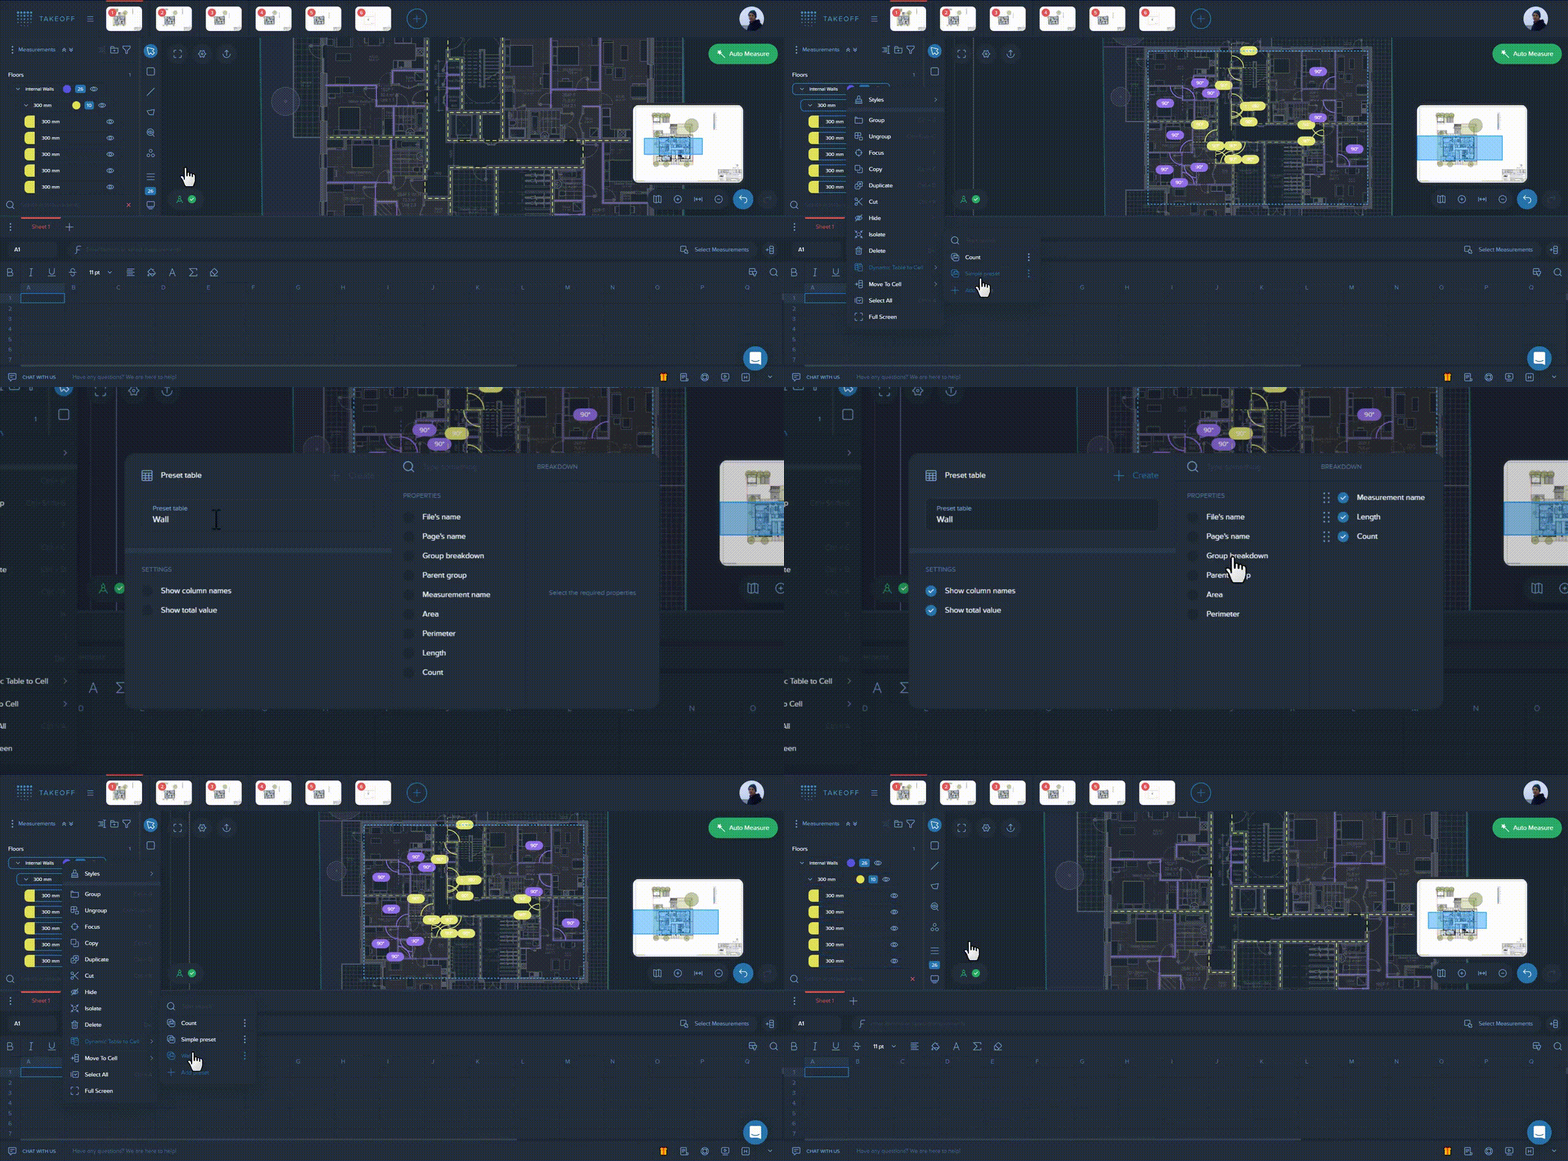
Easily decide which data and in which order you would like to add to your spreadsheet. Add only suitable properties. Rearrange columns. Choose whether to show column names and total values. Create your own report structure and fill it with measurements in several clicks.
Right click on the necessary folder or measurement and choose "Move to Cell" or "Dynamic Table to Cell" options.
Then press "Add preset".
Set your future preset's name on the top left of the Presets window.
In the "Settings" field, you can also choose whether to show column names and total values in your future report.
In the "Properties" field, tick properties you'd like to transfer to the spreadsheet from the following list:
File's name
Page's name
Group breakdown
Parent group
Measurement name
Area
Perimeter
Length
Count
In the "Breakdown" field, you'll see all the properties which you've added to the preset. There, you can also change properties' order by dragging & dropping them to the relevant position.
Once all the steps are completed, press the "Create" button at the top of the Presets window.
Now your first preset is created! Repeat the 1st step once again and apply the preset you've just created.
