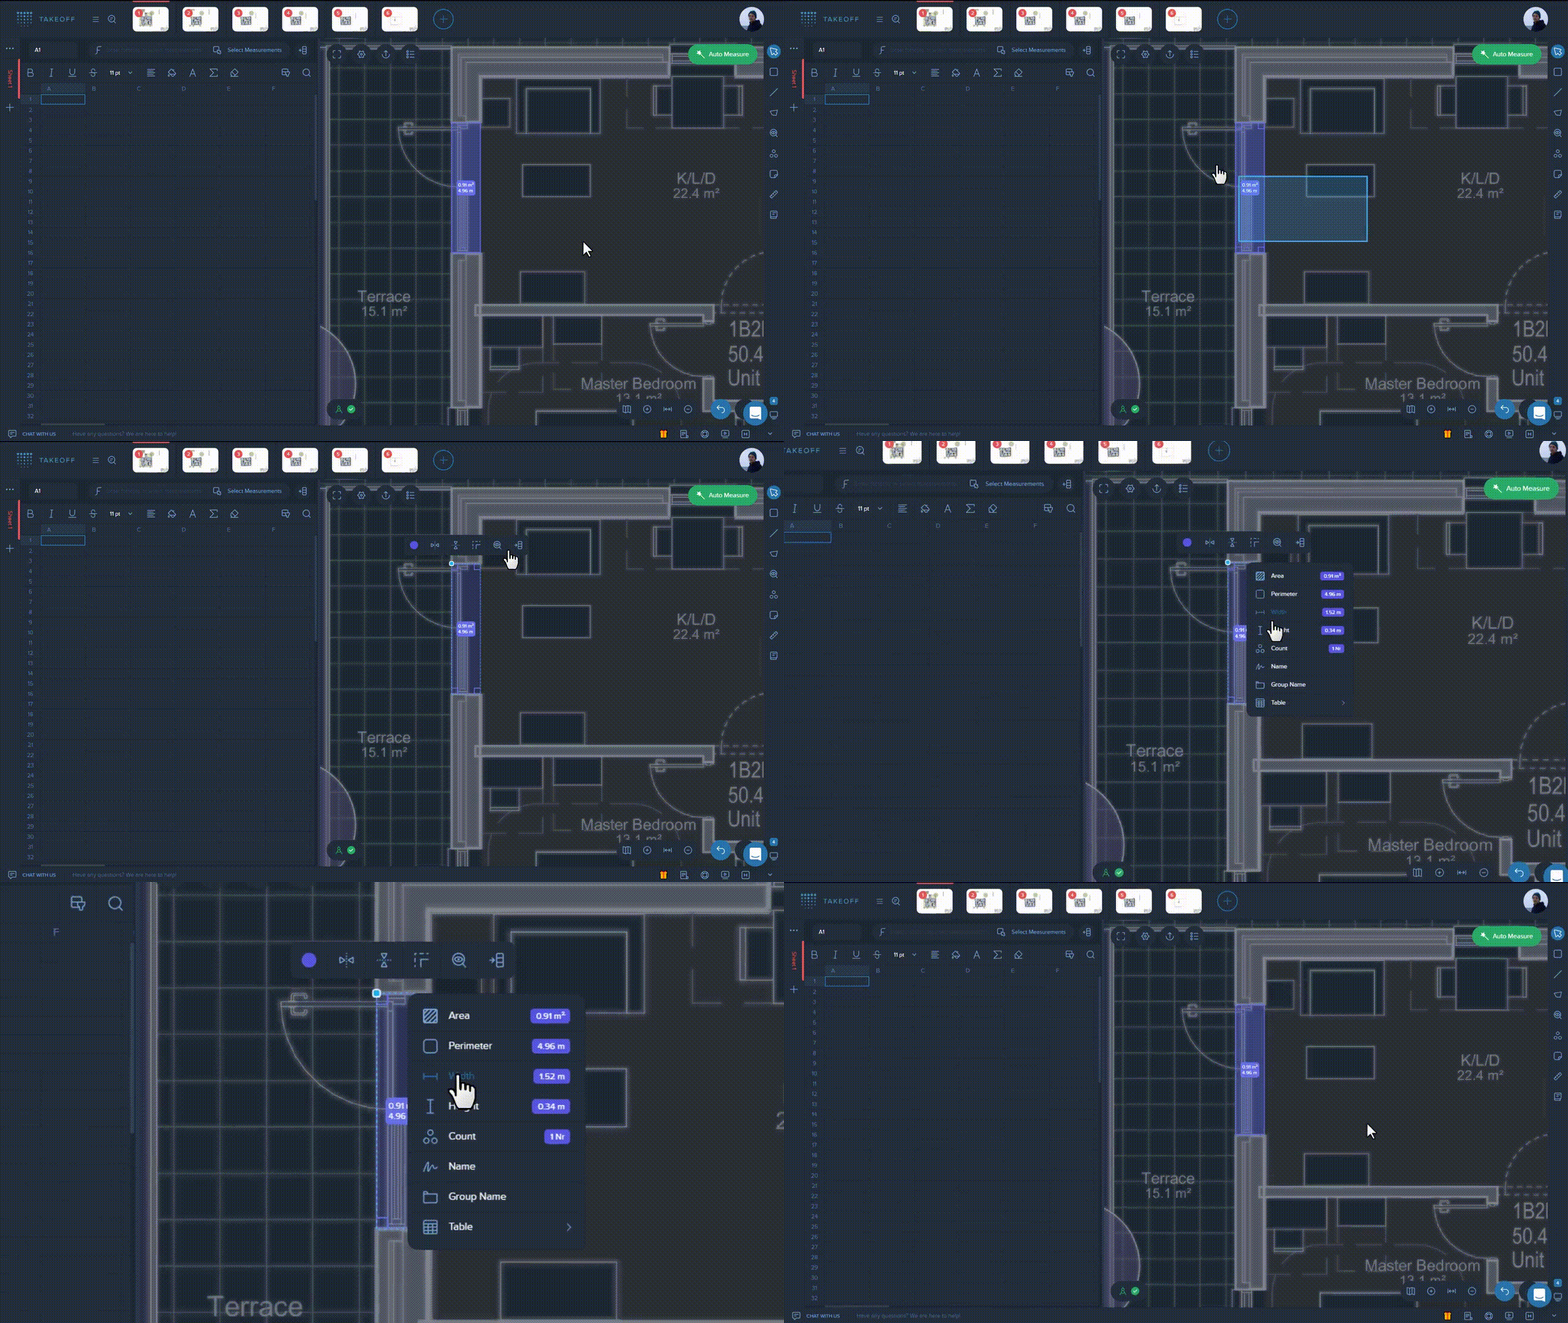
Be flexible in transferring data to a spreadsheet. Move to the spreadsheet only the required data in the way your business requires. All of that is easily achievable with the help of the "Move to Cell" feature.
To transfer measurements to the spreadsheet using this feature, right click on the relevant measurement and choose the option "Move to Cell". Then select the property you need to add to the schedule.
Check the list of properties you can add to the schedule:
Name — the name of the measurement itself
Group Name — the name of the folder it belongs to
Area
Perimeter / Length
Count
Height (for rectangles & polygons)
Width (for rectangles & polygons)

You are also able to transfer all the data about the selected measurement (eg. its name, area, perimeter, quantity, group name, etc.) to your schedule in a structured way within one click. All you need to do is to choose the "Move To Cell" feature and select the option "Table" there.
Any kind of nested measurement structure will be also easily transferred to your schedule into a structured view in just a click using the "Move To Cell — Table" option.
📝 Note!
When using the "Table" option, you need to specify properties you want to see in the spreadsheet and their order first. To do this, click on the "Add preset" option & customize data in the way you need.